No sound reaching the computer
The meter is still. Check the send is assigned and turned up on the desk, the cable is in a line input, the right device is chosen in the app, and press Refresh if the interface was plugged in after the app opened.
Setup guide
Connect a spare line-level output from your mixer to a USB audio interface, then the interface to your computer. If the mixer has USB audio built in, you may be able to go straight in. This guide shows which output to choose on the sound desk, which cables to use and how to set a clean speech level for SpanVoice, so the captions and spoken translation come out right at the other end.
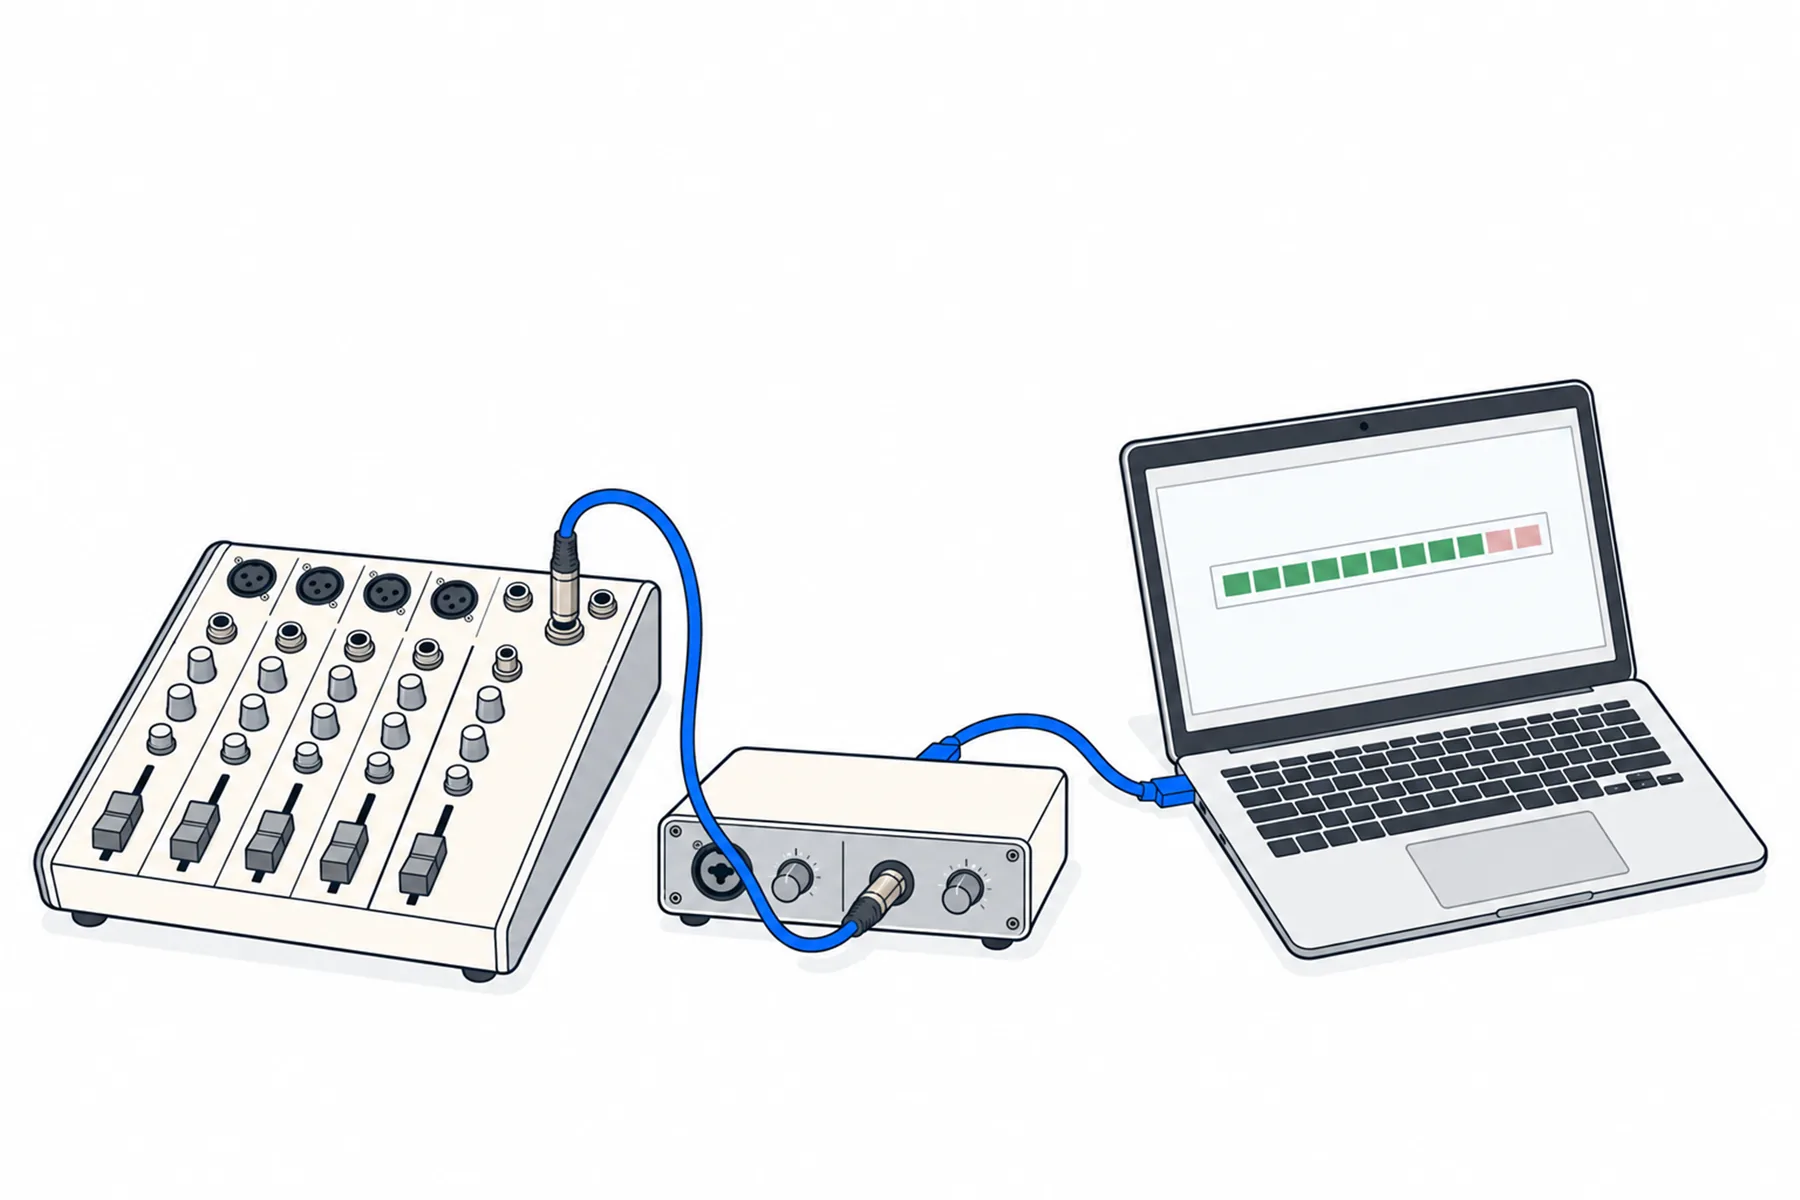
Speech microphones into the desk, one spare output into a small USB interface, the interface into the Windows computer running the desk app. From there SpanVoice turns the sound into captions and spoken translation on every phone and screen. Five steps, and only the first two involve a cable.
Most of the work is on the desk. Save it in a scene and it is there next time.
SpanVoice needs the words and nothing else. Do not use the main left/right output: it carries the music, the playback and every change the operator makes during the event. Use an output that is doing no other job in the room:
On that send, bring up only the microphones people speak into: lectern, handheld, headset, lapel. Leave music, playback, click and effects returns at zero. Take the send pre-effects so no reverb or delay reaches it. Mono is right; one output is all you need. Put a strip of tape on it that says SpanVoice so nobody repurposes it on the day.
If the desk recalls a saved scene at the start of the day, save the scene with the SpanVoice send in it. A recall that forgets the send is the most common reason the words stop before the event has begun.
A mixer puts out line level. The computer needs to take it in at line level, not through a microphone socket. There are three ways, in order of how well they work; the table under the steps compares them.
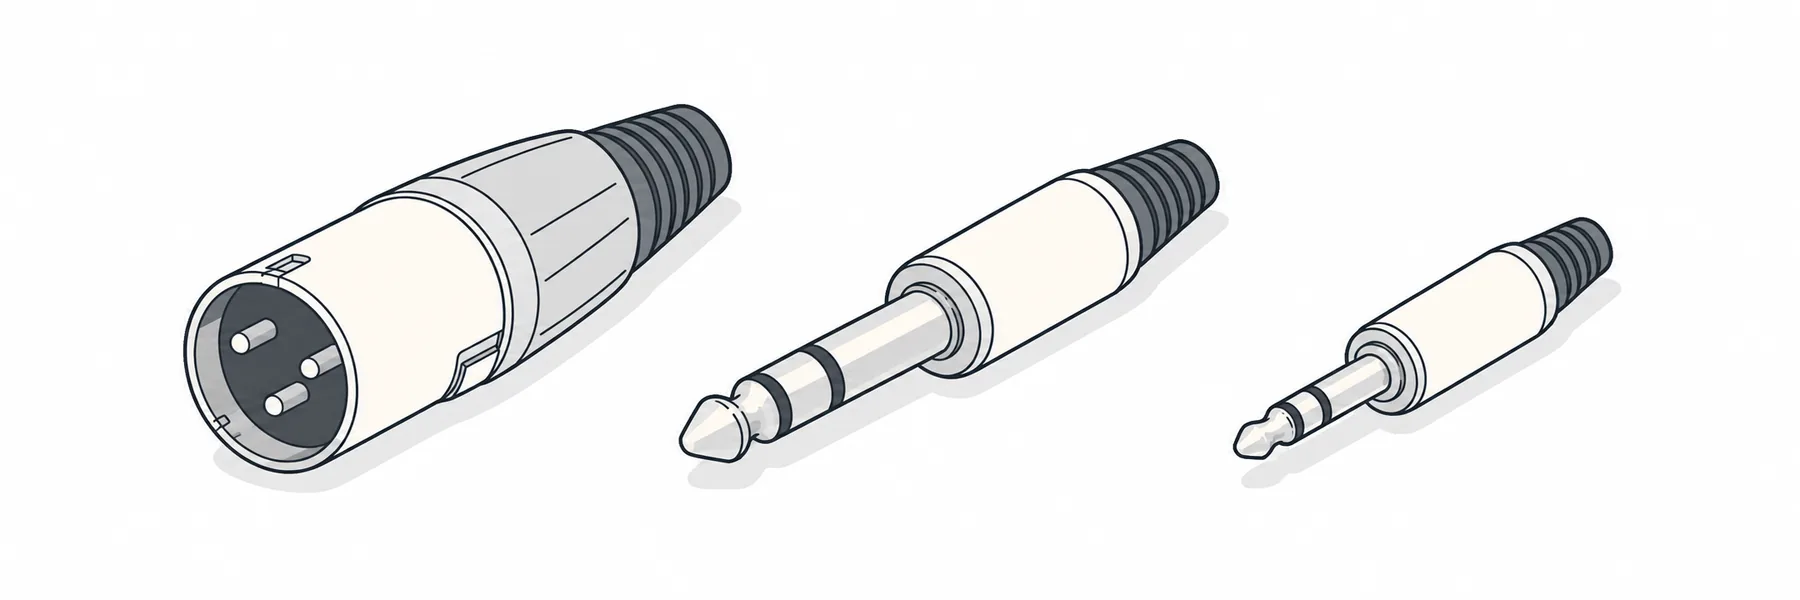
A balanced cable (XLR or TRS, three conductors) keeps hum out over a long run between the desk and the computer. An unbalanced cable is fine for a metre or two on the desk.
Open the desk app on the computer, choose the interface in the Input panel, and watch the meter. It runs before you start streaming, so nothing is sent while you do this. Have somebody talk at the microphone at the level they will use on the day, the loudest speaker you expect.
Save the desk scene with this send in it, and check the meter for a few seconds before each event. The send is separate from the main mix, so it will not drift on its own, but a recalled scene or a new microphone can change it.
Louder is not better. A feed that overloads loses words; a steady, clean feed with room to spare is what SpanVoice is built for.
Press Start streaming and read the words on your own phone from the venue’s audience link. Say a sentence with a name in it and a number in it, and watch both arrive. Then mute the microphone on the desk and watch the meter in the app: if it drops, mute follows the send on your desk; if it keeps moving, mute does not reach the send and the operator needs to pull the fader down as well. If nobody is around to talk, switch the Input panel to Test file and play a recording of a sentence or two instead; it is sent exactly as a microphone would be.
There is no way to listen to the live input on the computer itself. To hear what SpanVoice hears, solo the SpanVoice send on the desk’s headphone output.
The desk output is now the one thing nobody needs to touch. Start streaming when the event starts, glance at the meter now and then, and press Pause audio during music or a break if open microphones are picking up the room. When a new microphone is added to the room mix, add it to the SpanVoice send as well, or that person’s words never appear.
All three give the desk app a recording device to choose. The difference is how much can go wrong.
| USB audio interface | Mixer with built-in USB | Computer line input | |
|---|---|---|---|
| Cable from the desk | XLR or TRS from the aux output into a line input on the interface. | None. The mixer’s USB cable carries the audio. | Unbalanced 3.5 mm lead from the aux output into a labelled line-in. |
| What the computer sees | The interface, as a recording device with one or more channels. | The mixer, as a recording device. On many analogue mixers only the main mix is on USB. | The built-in line input, if the computer has one. |
| Level control | Desk send, then the gain knob on the interface. | Desk send, and the USB routing level where the desk has one. | Desk output only; the socket itself has no sensible control. |
| Hum and noise | Balanced in, so a long run is quiet. | Digital, so none from the cable. | Unbalanced and close to the laptop’s power supply; hum is common. |
| Good for | Any desk with a spare output. Analogue desks. The default choice. | A digital desk that can route the aux send to USB, or an analogue mixer whose USB carries the mix you want. | A test, when the computer has a true line input and nothing else is to hand. |
Start with the meter in the desk app: still, too high, or moving when nobody talks tells you which of these it is.
The meter is still. Check the send is assigned and turned up on the desk, the cable is in a line input, the right device is chosen in the app, and press Refresh if the interface was plugged in after the app opened.
A playback or instrument channel is in the SpanVoice send. Take it out, and use Pause audio during music.
The level is too hot and peaks are clipping, or too low and quiet words are lost. Set it again with the loudest speaker.
On your desk mute does not reach that send. Set the send post-fade, check the desk’s routing for a mute-follows-send option, or pull the fader down as well as muting.
A ground loop between the desk and the computer, or an unbalanced cable on a long run. Use a balanced cable into a line input, a DI with its ground lift pressed, or run the laptop on battery to confirm the cause.
Open microphones nobody is using. Mute them on the desk or pause the audio; listeners are told it is paused.
Their microphone was added to the room mix but not to the SpanVoice send. Add it.
Still unsure
Send a photo of the back of your desk and we will tell you which socket to use.
Talk to usThe free credit lets you test the setup at your own desk. No credit card needed.
A$10 of free credit when you sign up, no credit card needed. Credit never expires — use it this week or next year.