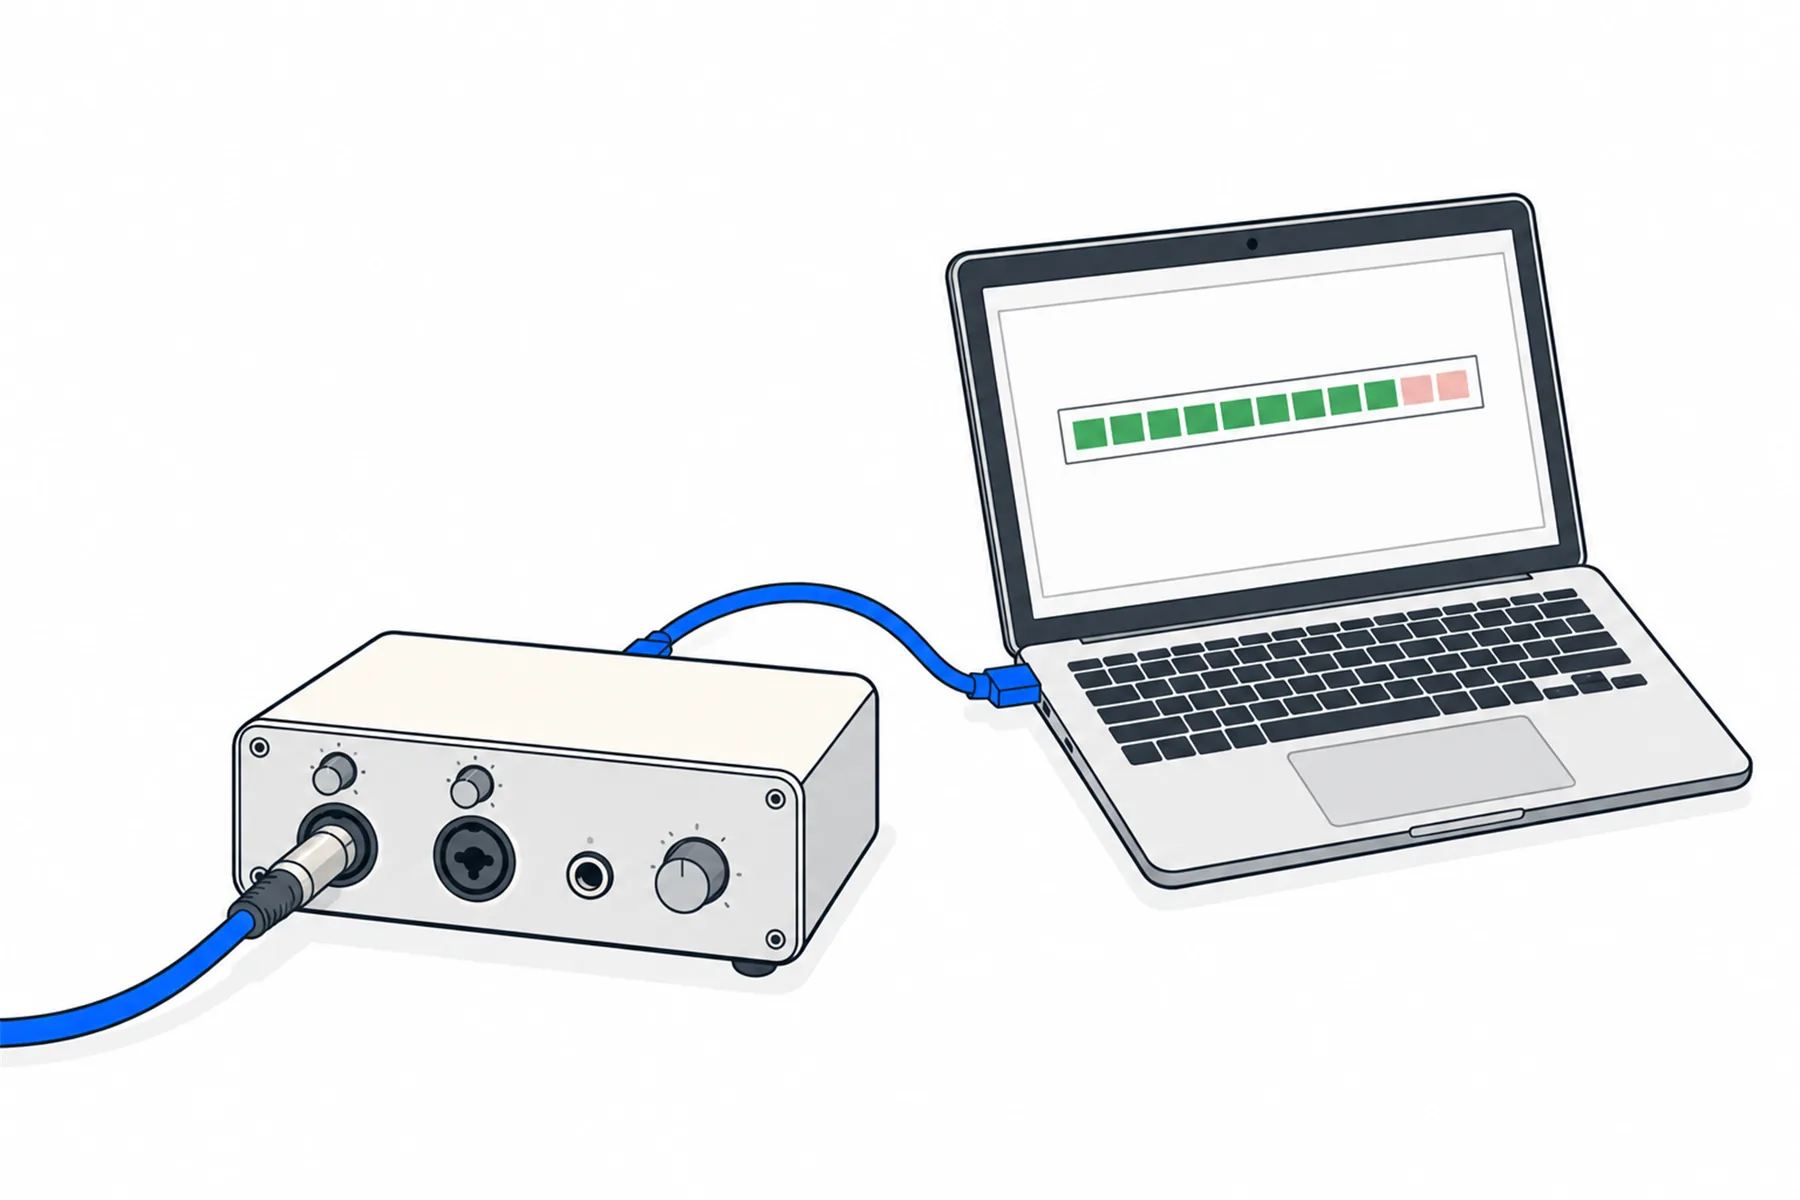
A small USB audio interface is a reliable way to get a sound desk feed into a Windows computer.
This guide shows what to look for, how to plug it in, which settings to make on the interface, how to
choose it in the desk app and how to set the level, so the feed arrives clean and stays that way.
The interface is the last piece of hardware between the desk and the computer. Windows
sees it as a recording device, the desk app lists it in the Input panel, and from there the sound
goes on to SpanVoice. When this part is right, nobody thinks about it again.
Sound deskspare output
line level
USB interfaceline input, gain low
USB
Windows computerthe desk app
internet
SpanVoice
The interface turns the desk feed into a recording device that Windows and the desk app can see.
Set up a USB audio interface in six steps
The first two are about buying and plugging in. The rest are settings you make once.
1
Choose an interface that does only what this job needs
First check whether you need one. A mixer with USB audio that can send the speech mix over USB
may connect straight to the computer: see if your desk connects by USB below,
and the mixer guide compares the options. If your desk cannot, an interface is the answer.
The interface has one job here: take a line-level feed from the desk and present it to
Windows as a recording device. Almost any small interface sold for home recording can do
that. Look for these, in this order:
A line input. Either a dedicated line socket, or a combined
socket that takes an XLR plug or a 6.35 mm plug. A desk output is line level,
so the input must be able to take a line feed. How an interface selects line
varies; step three explains what to check.
A level control you can reach. Most interfaces have a gain knob. You will
set it once with the loudest speaker and leave it. Some line inputs have fixed gain or a
software control instead, which also works.
USB power from the computer. Most small interfaces take their power
from the USB cable. A few need a separate power supply; the label or the manual says so.
Windows support from the maker. Many interfaces appear in Windows
the moment they are plugged in. Some need the maker’s driver first. Check the
maker’s page for your model before the day, not at the desk.
One input is enough, and two is common. You do not need a headphone output, phantom power,
effects or a built-in mixer for this job, though they do no harm if they are there.
An ordinary USB microphone is not a substitute: it has a microphone built in
and no line input for a desk.
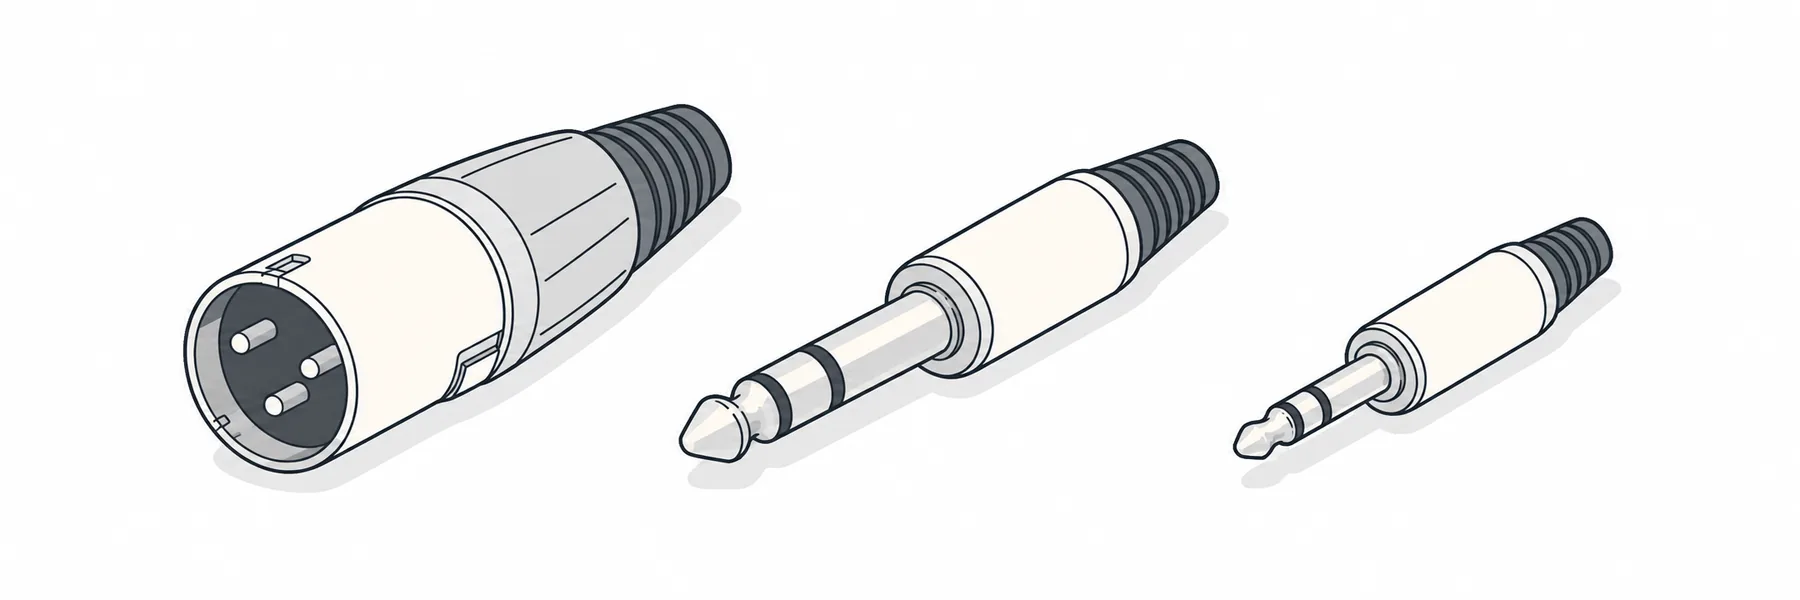
Left to right: XLR, 6.35 mm TRS and 3.5 mm TRS plugs. The connector shape alone does not tell you whether an input accepts line level; check the equipment’s specification.
If the only sockets on the interface are labelled for microphones, check the manual before
buying. Many combined sockets take a line feed on the jack side; some are microphone-only.
2
Plug it in the right way round
Plug the USB cable into a socket on the computer itself to start with. A direct
connection gives the interface the power it needs and removes one thing that can drop out
mid-event. A powered hub or dock may work, but it is one more thing to rule out if the
interface disappears. Do it before you open the desk app.
If the maker says a driver is needed, install it now and restart if it asks. Then check
in Windows: open Settings, System,
Sound, and look under Input. The interface should be
in the list. If it is not there, the app cannot see it either, so fix that first.
Run a balanced lead from the spare output on the desk to the interface, as the
mixer guide shows. Check which plug the interface
wants for line level: on many combined sockets it is the centre 6.35 mm jack, so
the lead from an XLR desk output may need a 6.35 mm TRS plug at the interface end.
Sound deskspare output
XLR / TRS
USB interfaceline input
USB
Windows computerSound settings, then the desk app
Desk to interface by cable, interface to a USB socket on the computer itself.
3
Set the input on the interface itself
Before any sound, set the front of the interface. These switches are where most
“it is too loud and crackly” calls come from:
Check how your interface selects line level. Many combined inputs use the centre 6.35 mm jack
for line signals, with instrument mode switched off, and the XLR side may be
microphone-only even though both plugs fit the same socket. Some interfaces have a mic/line
switch instead. The manual says which.
Use the line input for the desk, with instrument or
Hi-Z mode off.
Turn the gain down, nearly to the bottom. You will bring it up in
step five.
Leave phantom power (48 V) off. A line feed does not need it.
If the input overloads with the gain low, check the desk send level first, then use the
interface’s input pad if its manual recommends it. Instrument or Hi-Z mode is
not a cure for a feed that is too hot.
Controls labelled monitor, mix or direct usually affect only what you
hear in headphones on the interface. Check the manual if you are unsure.
4
Choose it in the desk app
Open the desk app. In the Input panel, with Live device
selected, open the device picker and choose the interface by name. The picker lists every
recording device Windows has; if the interface was plugged in after the app opened, press
Refresh and it appears.
Under the picker the app shows a format line such as 48 kHz · 2 ch →
16 kHz mono. It describes the device as Windows sees it. Nothing about it
needs changing, and an interface with two inputs showing 2 ch is normal when only one
is connected.
The app remembers the device you chose and picks it again next time. If a restart or a
different USB port makes the interface appear under another name, choose it again.
The meter moves as soon as a device is chosen, before you press Start streaming. Nothing
is sent until you do.
5
Bring the gain up and read the meter
Have the loudest speaker talk at the level they will use on the day. Raise the
interface gain until the meter in the desk app moves well into the green on every
sentence and the red segments never light. If the meter is still, jump to the
troubleshooting cards below. Watch the interface’s own input or clip light as well:
a green meter in the app does not prove the input was clean, because sound can distort
before it reaches the app. If the interface clips, lower the level coming in or the gain;
turning the Windows recording level down afterwards does not repair a distorted signal.
If the meter will not come up even with the gain well open, check the recording
level for that device in Windows Sound settings, then the send level
on the desk. The meter in the app follows what Windows delivers.
If it touches red with the gain low, turn the desk send down first, then try the
interface pad.
If it keeps moving when nobody is talking, the desk send may be carrying something it
should not, or the room noise or the input’s own noise is being picked up. Mute
the send on the desk to find out which. Fix it on the desk, not in the app.
The help centre page Setting the level covers reading the meter in more detail.
Mark the gain knob with a dot of tape once it is right. If somebody bumps it, the tape shows where it was.
6
Make it the same every time
An interface that worked on Tuesday is the one that fails on Sunday because something was
moved. Take two minutes to make it repeatable:
Use the same USB socket each time. Windows can list a device under a
different name when it is plugged into a different socket.
Keep the USB cable with the interface and carry a spare of the same length.
Label the interface input with the name of the desk output that feeds it.
Plug it in and check the meter before the first person arrives, as
a habit, the same way you check a microphone.
Test file mode checks the app and the onward streaming path without using the
mixer or the interface. If that works but the live input does not, check the desk feed,
the cable, the interface and the Windows input settings.
What to look for in an interface
Most small interfaces meet most of these. The line input decides whether it works at all.
Feature
Do you need it?
Why
A line-level input
Yes
A desk output is line level. An input that only does microphone level can be overloaded by it.
A reachable level control
Useful
Usually a gain knob: the control you use to set the level the desk app sees. Some line inputs use fixed gain or software.
Power from USB
Usually
No power supply to forget. Check the label if the interface has a power socket.
Appears in Windows without a driver, or has a driver from the maker
Yes, one or the other
The desk app can only list what Windows lists. Check the maker’s page for your model.
Two inputs
No
One carries the speech feed. A second is a convenience.
Phantom power
No
A line feed does not use it. Keep it off.
Headphone output
No, but useful
You can listen to what the interface receives. It does not change what is sent.
A USB microphone instead
Not a substitute
An ordinary USB microphone has no line input for the desk.
If your desk connects by USB
Many digital desks, and some analogue mixers, are a USB audio device themselves. Then the desk takes the place of the interface, and these points replace steps one to three.
Check Windows can see the desk
Plug the desk’s USB cable into the computer itself, install the maker’s driver if it needs one, then open Windows Sound settings and look under Input. If the desk is listed there, the desk app can list it too. Some desks have a USB mode or setting on the desk; the manual says.
Send the speech mix to the first USB channel
A desk usually offers many USB channels. If a device has more than two, the desk app uses channel 1 only and ignores the rest. A two-channel device is averaged to one. So route the bus or send that carries the speech mix to USB channel 1 on the desk.
Set the level on the desk
There is no interface gain. The level comes from the bus or send level on the desk and any USB output level it has. Have the loudest speaker talk, bring it up until the meter in the desk app is well in the green, and keep it out of the red.
Do not be surprised by the channel count
The format line under the picker shows the device as Windows sees it, with a number such as 18 ch if the desk has many USB channels. That is normal. The app takes channel 1 and sends 16 kHz mono.
If the USB is already recording the event
Check the desk lets the computer take the same USB channels that the recording uses. If the two jobs get in each other’s way, put an interface on a spare output and keep them apart, as steps one to three describe.
The app will not open the desk
If the chip says Audio, the device would not open. Close any other program using the desk’s USB audio, check the desk’s USB setting, and unplug and replug it and press Refresh.
Troubleshooting the interface
The meter in the desk app is the quickest test: still, too high, or moving with nobody talking each point to a different place.
The interface is not in the list
Check it is in Windows Sound settings first. If it is there, press Refresh in the Input panel. If it is not, try another USB socket on the computer, another cable, and the maker’s driver page.
The meter is still
Check the cable is in a line input, the input is set to line, the gain is up, the desk send is up and the right device is chosen. Then check the recording level for the device in Windows. If Windows lists the interface but the meter stays still, check Settings, Privacy & security, Microphone, and that desktop apps are allowed to use it.
The meter will not rise even with the gain open
The Windows recording level for that device may be very low, or the desk send is. Raise the send first.
The sound is distorted or the interface clips
The input is overloaded: the gain is too high, the desk send is too hot, or a line feed is going into a microphone input. Use the line input, lower the desk send and the gain, and use the interface pad if its manual recommends it. Watch the interface clip light as well as the meter.
Clicks, crackles or dropouts
These are different from overload and can come from the USB connection, the driver or a busy computer. Try another cable and another socket on the computer, install the maker’s current driver, and close other programs that use audio.
A steady hum or buzz
A balanced cable into a line input is the first fix. If it remains, run the laptop on battery for a minute to see whether its power supply is the cause.
It worked, then disappeared mid-event
Check the USB cable and socket. A loose cable, an unpowered hub or a power-saving setting on the port can drop a device. Plug it directly into the computer and choose it again in the app.
It has a different name after a restart
Windows can list a device differently after a restart or when it is plugged into another socket. Choose it again in the Input panel.
Still unsure
Questions about interfaces
Send us the model and a photo of its front panel and we will tell you which switches to set.
One with a line input, an accessible level control, USB power and support for Windows from the
maker. The kind sold for home recording is right; it does not need to be expensive. Check
the maker’s page for your model before you buy.
Do I need to install a driver?
Some interfaces appear in Windows as soon as they are plugged in. Others need the
maker’s driver first. If the interface is in Windows Sound settings under Input, the
desk app should list it; choose it and confirm the meter moves. If it is not there, look for a
driver on the maker’s page.
Can I use a USB microphone instead?
An ordinary USB microphone is not a substitute for an interface with a line input. It is a
different job: one person speaking close to it.
Should phantom power be on?
No. A line feed from a desk does not need it. Keep it off.
Does the interface have to be plugged in before the app opens?
It is best to, because the list is read when the app opens. If you plug it in afterwards,
press Refresh in the Input panel and it appears.
Do I need a separate interface if my mixer has USB?
Not always. If the mixer appears in Windows as a recording device and can send the speech
mix over USB, you can choose it directly. Route the speech mix to USB channel 1, because the
desk app uses only the first channel of a device that has more than two. The
desk over USB section above covers it, and the
mixer guide compares the options.
My digital desk has 18 USB channels. Which one does the app use?
The first. When a device has more than two channels, the desk app takes channel 1 and ignores the rest, so send the speech mix there. A device with exactly two channels is averaged to one.
Where to go next
Plug it in and watch the meter move.
The free credit lets you test the setup at your own desk. No credit card needed.