Phones will not scan it
Usually it is too small for the distance, shiny so it reflects the lights, low in contrast, stretched, or cropped so the blank border is gone. Print it larger, use dark on light, and reprint on matte paper.
Setup guide
One QR code gets every guest to the reading page on their own phone, where they choose their language. This guide shows where to get the code, how to print it at the right size, where to put it so people see it, and how to test the scan before the doors open.
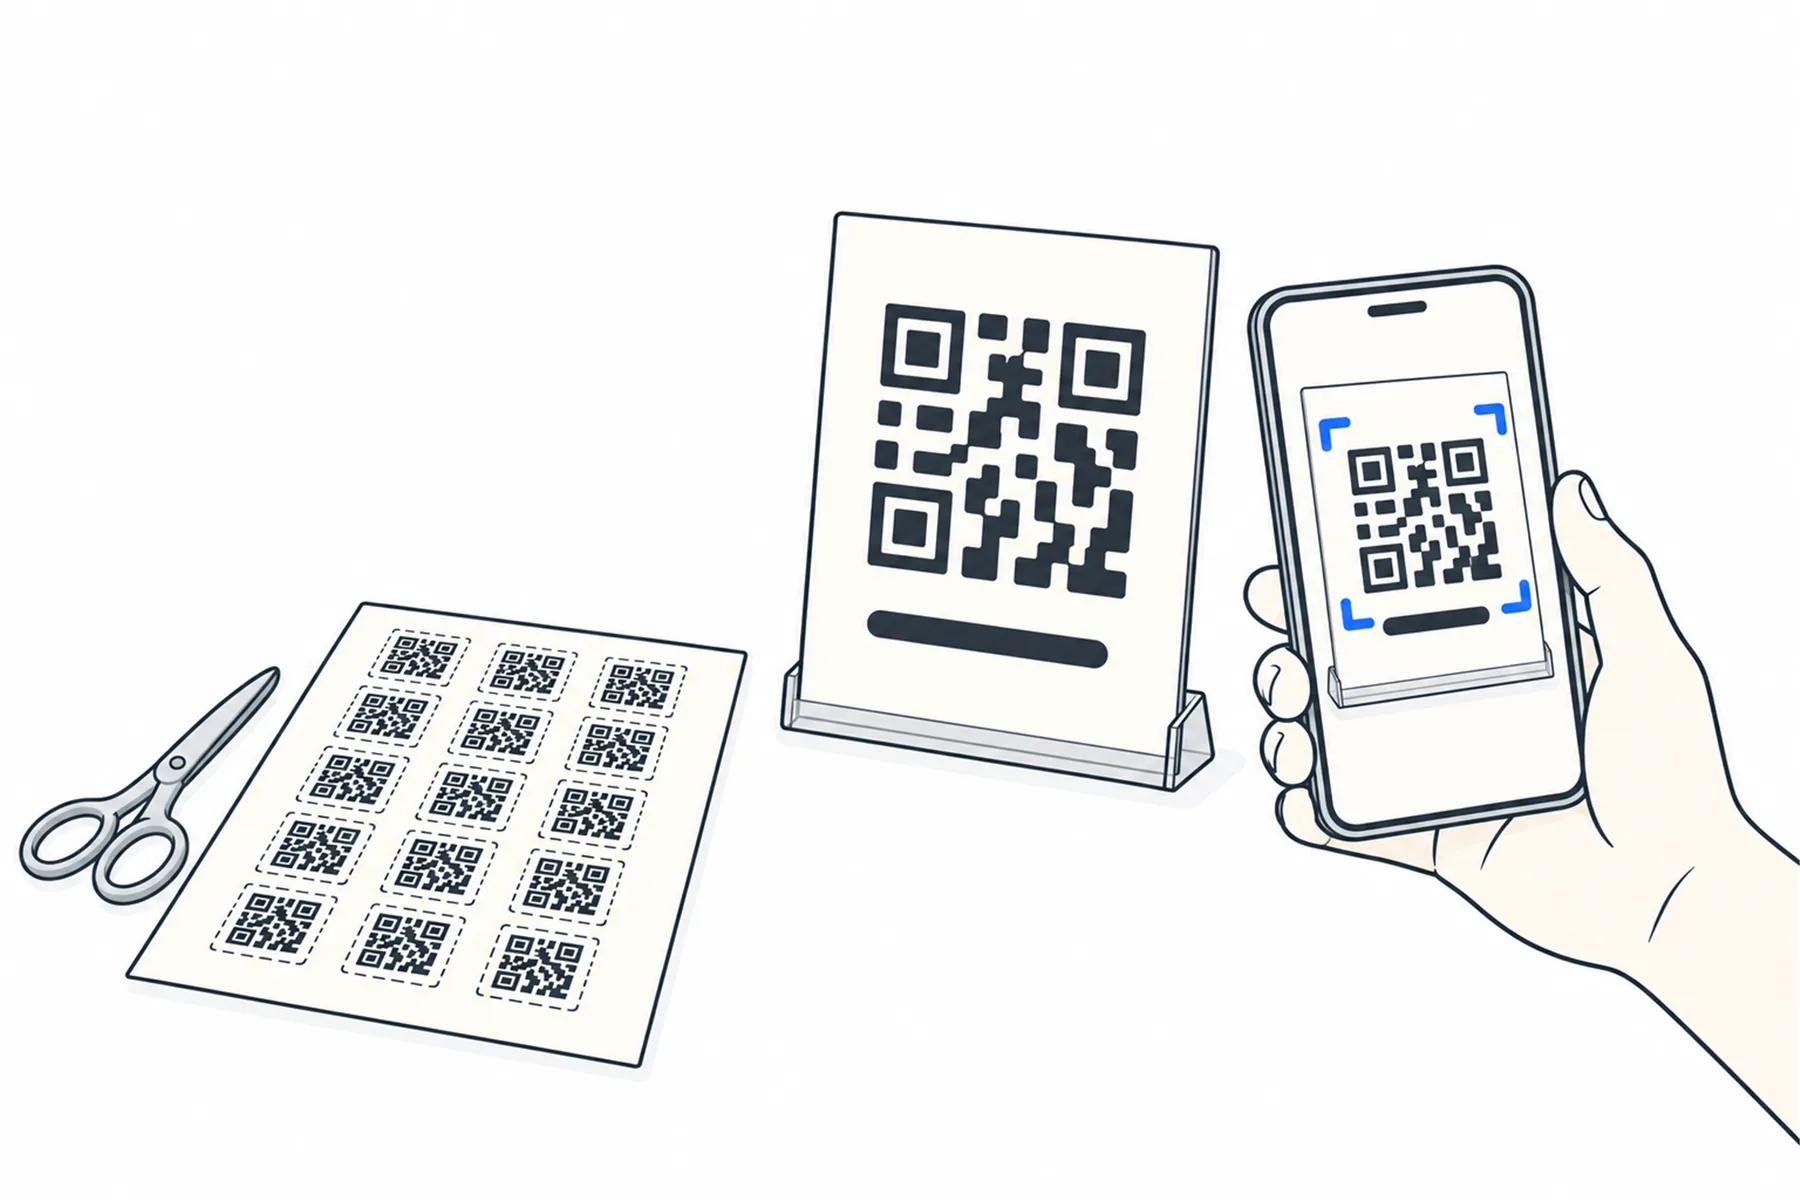
A guest scans the sign, the reading page opens with a list of languages, and they pick one. There is no app to install and no account to make.
The code is the easy part. Size, placement and a test do the rest.
People scan when they are already holding a phone and already waiting: at the door, in their seat, in the minutes before the start. A sign that is somewhere else, or too small to read from where they stand, is not noticed.
The code opens the venue’s reading page, spanvoice.com/v/ followed by the venue code. On many phones the camera first shows a link that has to be tapped. So the sequence is: open the phone’s camera, point it at the code, tap the link that appears, then choose a language on the reading page and the words start. Nothing is installed and no account is made.
The code is the venue’s reusable audience link, so you do not need a new sign for each event. Check any old signs before you reuse them.
In the SpanVoice admin, open the venue’s Overview page. The For your audience panel shows the reading link and its code. There are three things to use:
The code carries the audience link only, with no event name or date in it, which is why the same sign can be used for more than one event. The link keeps working as long as the venue exists; if a venue is deleted, its signs stop working.
The sticker sheet is set up for A4, with fifteen stickers of 50 mm and a code of about 34 mm on each. Print it at actual size, not shrunk to fit the page, then cut along the dashed lines. Plain paper works, or sticker paper if you want to stick them down.
A code that size is for close range: a table, a seat back, a programme or a hand-held card. It is too small for a wall. Printing a sign larger helps, but how well it scans still depends on the print quality, the lighting and the phone.
The stickers carry only the code and the link. If you want a heading, add it in your own words beside or above the code, in the languages your audience speaks, for example an invitation to scan and read the event in their own language. Keep the heading clear of the code and do not cover or crop the blank border around it.
For anything seen from across a room, use the SVG download. It stays sharp at any size, so you can place it in a poster or a flyer and print it large. As a starting point, the code itself, not the whole poster, should be about a tenth as wide as the distance people will scan it from, so a person scanning from two metres away needs a code about twenty centimetres wide. It is only a starting point: test it, because print quality, lighting and phones all change the result.
Use several places, because each catches different people:
The page shows Off air when nothing is running and starts by itself when the event begins, so the signs can go up early.
Scan every kind of sign from where people will stand, not from a table at the front. Open the phone’s camera, point it at the code and tap the link that appears:
When an event is running, choose a language and check words arrive.
Tape a spare small sign somewhere obvious and tell the door team where it is. A sign that people cannot reach or read from where they stand is a common reason it seems not to work.
All of them carry the same audience link.
| Where | Use | Why |
|---|---|---|
| Seats, tables, programmes | Print sign (the sticker sheet) | Fifteen small codes on an A4 page, cut on the dashed lines. |
| Doors, walls, lectern | SVG download | Sharp at any size, so it can be printed large. |
| A slide before the event | PNG download | Made for screens and projectors. |
| Where nothing else is accepted | JPG download | The fallback format. |
| On the desk computer screen | QR button in the desk app | Shows a large code that you can point a phone at. |
When a sign does not work, it is usually size, light or the wrong link.
Usually it is too small for the distance, shiny so it reflects the lights, low in contrast, stretched, or cropped so the blank border is gone. Print it larger, use dark on light, and reprint on matte paper.
Test on several phones, including an older one. If one phone fails, make the code bigger or move the sign closer to where people stand.
That is normal when no event is running. The page waits, and the words start by themselves when the event begins. If you know an event is running, check that the code on the sign belongs to the right venue.
Check whether another website opens on that phone. If it is on the venue Wi-Fi, complete any network sign-in page and try the audience link again. Check the address, and if necessary try mobile data.
The code or the typed link is wrong. Download the code again from the venue’s Overview page, and do not retype the venue code by hand.
Print the sticker sheet at actual size, not shrunk to fit, on A4 paper.
People need to see it and know what it is for. Put a heading beside the code in the languages of your audience, put one at each door, and say it from the front before you begin.
Still unsure
Tell us the room and how people arrive and we will suggest where the signs should go.
Talk to usThe free credit lets you rehearse in your own room. No credit card needed.
A$10 of free credit when you sign up, no credit card needed. Credit never expires — use it this week or next year.